DNSSEC, Amplify Secrets, and the AWS Controls Worth Skipping

The first three posts covered controls that apply to almost any small AWS account: root and the first hour, getting off root and static keys, and limiting what a compromise can reach. The remaining work depends on what the account actually runs.
This post will, in part, focus Route 53 and Amplify site as a popular option for deploying and hosting React/Next application. And that means DNSSEC, Amplify secrets, Terraform state, CDK bootstrap roles, and infrastructure-as-code scanning. It also means deciding what not to run. Most hardening guides omit that part, but choosing not to enable AWS Config is still a decision and deserves a reason.
DNSSEC, and the ordering that will take your site down#
DNSSEC gives resolvers cryptographic proof that answers for your zone were not forged, which is the defense against cache poisoning and DNS hijacking. It is the highest-value Route 53 control available, and the only item in this entire program with a meaningful recurring cost.
Four steps, and the order is load-bearing in both directions.
Create the KMS key in us-east-1. It has to be asymmetric, SIGN_VERIFY, and ECC_NIST_P256. Route 53 hosted zones are global, so the key backing the signing key must live in us-east-1. Grant the Route 53 service principal kms:DescribeKey, kms:GetPublicKey, and kms:Sign in the key policy.
Create the key-signing key and enable signing.
aws route53 create-key-signing-key --hosted-zone-id <ZONE> --key-management-service-arn <KMS_ARN> --name ksk-example-com --status ACTIVE
aws route53 enable-hosted-zone-dnssec --hosted-zone-id <ZONE>
Wait for the previous NS and SOA TTLs to expire everywhere.
Then establish the chain of trust by adding the DS record at your registrar. For a domain registered in Route 53: Registered domains, your domain, DNSSEC keys, Add key. Verify with dig +dnssec example.com or an online DNSSEC analyzer.
An inaccessible KMS key eventually breaks the domain. A bad key-policy change sets the KSK to ACTION_NEEDED; once the last RRSIG expires, validating resolvers start failing lookups. AWS strongly recommends a CloudWatch alarm on DNSSECKeySigningKeysNeedingAction, and DNSSECInternalFailure deserves one too. Never schedule deletion of that key. Once signing is on, Route 53 also caps record TTLs in the zone at one week and silently clamps anything longer without returning an error.
On cost: AWS does not charge to enable DNSSEC signing on public hosted zones or DNSSEC validation on the Resolver. You pay KMS for storing the private key and for signing operations, which lands around $1 a month. One key can serve multiple hosted zones, so this does not scale with zone count.
Back up the one thing that is not reproducible#
The Amplify app rebuilds from GitHub. The infrastructure rebuilds from Terraform or CDK. The Route 53 record set rebuilds from nothing, because it is not backed up anywhere and deleting a hosted zone is irreversible.
aws route53 list-resource-record-sets --hosted-zone-id <ZONE> > dns-backup-$(date +%F).json
Commit that, or run it from a scheduled GitHub Action using the OIDC role from the second post. It costs nothing and takes a minute.
The hazard it protects against is worse than it sounds. Recreating a deleted hosted zone assigns new NS records, so you have to update them at the registrar and the domain stays dark until propagation finishes. If DNSSEC is enabled, you also get to redo the entire DS-record chain of trust. Managing the zone in Terraform helps but does not save you, because terraform destroy deletes it just as thoroughly. Add lifecycle { prevent_destroy = true } to the zone resource.
Beyond DNS: keep versioning on the state and trail buckets, confirm branch protection on main, and pick up AWS Backup only when you add something stateful like RDS, DynamoDB, or EFS.
Amplify environment variables are not a secrets store#
They look like one. They are not. The Amplify Gen 2 docs warn against storing secret values in environment variables because the values are written in plaintext into build artifacts under .amplify/artifacts and can be emitted in CloudFormation stack event messages. Anyone who can read a build log or a stack event reads your secret.
On Gen 2, use the real thing: Amplify console, your app, Hosting, Secrets, Manage secrets, set per-branch or all-branch values, then reference them in code through the secret() function. Amplify resolves the right value per environment.
While you are in Amplify, scope its service role to what the app needs rather than AdministratorAccess. Turn on access control, meaning basic auth, for preview and pull-request branches so unreleased work is not publicly indexable.
The IaC substrate nobody scans#
Scanning Terraform for misconfigurations is standard practice. Protecting the two artifacts that the scanning ignores is not, and both are higher-value targets than anything they would find.
Terraform state stores secrets in plaintext. Every resource attribute, including database passwords and generated keys, sits in that file. Anyone with s3:GetObject on the state bucket has all of it, and no amount of scanning changes that.
terraform {
    backend "s3" {
        bucket       = "myorg-tfstate"
        key          = "prod/terraform.tfstate"
        region       = "us-west-2"
        encrypt      = true
        use_lockfile = true
    }
}
DynamoDB-based locking is deprecated and slated for removal in a future minor version. use_lockfile switches to S3-native locking, which was experimental in Terraform 1.10 and became generally available in 1.11. During a migration you can set dynamodb_table and use_lockfile at the same time.
The state bucket is a chicken-and-egg problem: bootstrap it with local state, then migrate the backend. Turn on versioning and Block Public Access, and restrict s3:GetObject on the state key to your CI role and admin identity only. Do not put it in a region you plan to deny or disable. Terraform 1.10 ephemeral resources and 1.11 write-only arguments can keep some sensitive values out of state entirely, which is better than protecting them after the fact.
On the CDK side, the default cdk bootstrap creates a CloudFormation execution role with AdministratorAccess. Most people never look at it.
cdk bootstrap aws://<ACCOUNT>/us-west-2 --cloudformation-execution-policies arn:aws:iam::aws:policy/PowerUserAccess --qualifier myorg1
Bootstrap is per account and per region. A custom qualifier has to be threaded through your app's synthesizer config or deploys will fail to find the roles, and you should never delete the CDKToolkit stack while stacks depend on it.
Make sure .tfstate, .tfvars, and cdk.out/ are in .gitignore. gitleaks catches leaked keys, but not every secret matches a detection rule.
Scanning the IaC itself, now that tfsec is gone#
tfsec is effectively end of life. Aqua merged its engine into Trivy, the last standalone release was v1.28.14 in May 2025, and the runtime notice says engineering attention has moved to Trivy. Check IDs like AVD-AWS-0086 carry over unchanged, so migration is mostly mechanical. Plenty of guides still recommend tfsec by name; they are out of date.
Use Trivy's config scan for Terraform:
- uses: aquasecurity/trivy-action@v...
  with:
      scan-type: config
      format: sarif
      output: trivy-results.sarif
      severity: CRITICAL,HIGH
      exit-code: '1'
- uses: github/codeql-action/upload-sarif@v...
  with:
      sarif_file: trivy-results.sarif
For CDK, cdk-nag runs inside the app and fails cdk synth, which blocks a bad deploy before it starts:
import { App, Aspects } from 'aws-cdk-lib';
import { AwsSolutionsChecks } from 'cdk-nag';

const app = new App();
new MyStack(app, 'MyStack');
Aspects.of(app).add(new AwsSolutionsChecks({ verbose: true }));
All are free and open source, all share the same blind spot: static analysis has no runtime context, so it cannot see your SCPs, your external bucket policies, or anything else evaluated at request time.
Get the notifications you are currently missing#
The root-login alert from the first post covers exactly one event. AWS Health events, meaning a compromised-credentials notice, a service disruption, a certificate expiry, an abuse report, arrive by email to the account contact and are easy to lose.
AWS User Notifications centralizes them. Console bell icon, Notification center, Notification configurations, Create. You have to select a notification hub first, then add event rules for AWS Health, CloudWatch alarms, and Support cases with an email delivery channel. Push notifications through the Console Mobile App are optional.
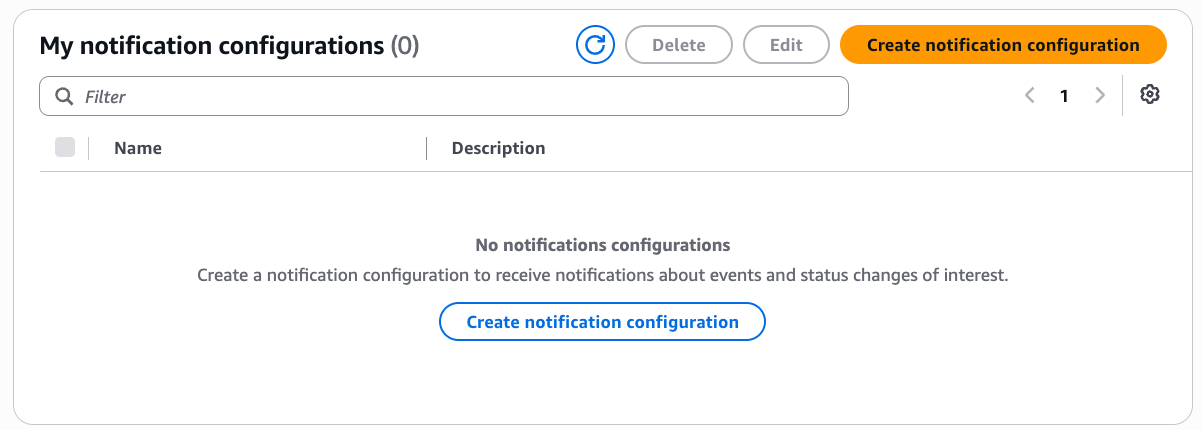 Notification Configuration
It is free beyond underlying delivery charges, where SNS and SMS beyond the free tier cost what they normally cost and email is included.
The hub choice has consequences. Notification hubs are an account-level setting identifying the regions where notifications are stored, processed, and replicated; you need at least one and can currently select up to three. Configuration data always lives in us-east-1 regardless of what you pick, so a strict region policy has to tolerate that. Email is delivered through Amazon SES API endpoints, and events from regions without an SES endpoint route through us-east-1. Do not put your only hub in an opt-in region you might later disable, or you lose the ability to create configurations and read notification history.
Cost allocation tags#
Tagging is not a security control, but it is what makes an anomaly attributable. When Cost Anomaly Detection flags $40 of unexpected spend, tags are the difference between knowing which project it was and guessing.
Billing, Cost allocation tags, activate your user-defined keys such as Environment, Service, Owner, and Project, plus optionally the AWS-generated createdBy tag. Only the management account or a standalone account can activate them, and it needs ce:UpdateCostAllocationTagsStatus and ce:ListCostAllocationTags.
Plan for about 48 hours of latency. A tag key can take up to 24 hours to appear in the activation list after you tag something, then up to another 24 hours after activation before it shows in Cost Explorer. Activation is not retroactive, so spend before activation stays permanently untagged. Tagged resources also have to actually incur charges before they show up grouped.
Enforce tagging at the source with Terraform's default_tags or CDK's Tags.of(), so nothing gets created untagged in the first place. On a site like this, the list is short: the hosted zone and the Amplify app.
Is an organization worth it for one account?#
An organization unlocks service control policies, resource control policies, and centralized root access management, all free. The question is whether any of them help here.
SCPs cap what principals in member accounts can do, including their root users. RCPs, launched November 13, 2024, cap what can be done to resources, which is the data-perimeter tool: no principal outside my organization can touch my S3, KMS, SQS, Secrets Manager, or STS. RCP coverage has expanded since launch, adding Cognito and CloudWatch Logs in early 2026. Both policy types have to be enabled explicitly, both auto-attach an allow-all default, and neither applies to the management account.
That last clause is the whole problem. Converting your existing account into a management account means your guardrails do not apply to the account running your workloads. You would get the paperwork of an organization and none of the protection. The correct layout is an empty management account for billing with workloads in a member account - you decide if it is worth the hassle.
Centralized root access management is the genuinely interesting piece. From the management account you can remove root credentials from member accounts entirely, prevent recovery, and perform tightly scoped privileged root tasks through short sts:AssumeRoot sessions capped at 15 minutes.
AWS's own write-up is the best explanation of the mechanism, and a community walkthrough covers what it feels like to operate:
Secure root user access for member accounts in AWS Organizations | Amazon Web Services
November 17, 2025: The MFA Security Key program, which provided eligible customers with free MFA devices, has been discontinued effective November 6th, 2025. While existing devices will continue to function normally, no new orders for MFA security keys will be accepted after the program closure date. AWS Identity and Access Management (IAM) now supports centralized […]
aws.amazon.com/blogs/security/secure-root-user-access-for...AWS Centralised Root Access Management : Simplifying Operations
I’m sure many of us came across managing Root credentials for multiple account and setting up...
dev.to/aws-builders/aws-centralised-root-access-security-...New member accounts are created without root credentials by default. But it governs member accounts only, never the management account's own root, so you still secure that root the way the first post described.
If you create the organization anyway, enable all features rather than consolidated billing alone; SCPs and RCPs require it. Free Tier usage alerts are automatic for standalone accounts but must be opted into for management accounts. Enrolling a Free plan account into an organization also upgrades it to paid and forfeits remaining credits.
For a solo dev with small workloads or just experimenting, my recommendation is to skip it; for the small team/startup - do it. Revisit when a project becomes a business, when a client needs a hard boundary, or when you specifically want a region-deny policy that no administrator can detach.
What to skip, and why#
AWS Config. Tempting, because a configuration timeline and continuous compliance rules are the detective counterpart to the preventive IaC scanning above. Continuous recording is $0.003 per configuration item, periodic recording $0.012, and rule evaluations $0.001 each for the first 100,000 per region per month. Enabling it also triggers an initial recording of every supported resource as a one-time charge.
The problem is that Config bills on activity, not uptime. A resource stuck in a create-and-delete loop generates thousands of configuration items silently. Vantage documented a case where an ECS cluster cycling ENIs hundreds of times an hour produced a large surprise bill:
Demystifying What’s Causing AWS Config Costs | Vantage
How to view and debug high AWS Config costs.
vantage.sh/blog/aws-config-pricingMulti-region recording multiplies it, and the data lands in an S3 bucket you pay for separately.
On small accounts Config's timeline tells you almost nothing CloudTrail event history does not, and it is the item most likely to turn a $2 bill into a $20 one. Defer it. If you enable it anyway, scope the recorder to specific resource types rather than all supported ones, turn on a handful of managed rules such as s3-bucket-public-read-prohibited, iam-root-access-key-check, and cloud-trail-enabled, and record only in your home region and us-east-1.
Security Hub. Same reasoning. Its per-resource pricing model, and the older per-finding model before it, both assume far more resources than this profile has. EventBridge rules and GuardDuty cover the useful ground at lower cost. Note that AWS renamed this service to Security Hub CSPM in October 2025 and shipped a separate, new Security Hub alongside it; the next post covers the split.
The unused access analyzer. Paid, at $0.20 per role or user per month. Below a handful of roles there is nothing for it to find that a credential report does not show for free.
The whole program, in order#
Everything from all four posts, sequenced so that nothing depends on something you have not done yet.
| Order | Do this | Because |
|---|---|---|
| 1 | Account and alternate contacts | Recovery has to work before you add MFA |
| 2 | Root MFA plus a backup device, then delete root access keys | Same threat model, and MFA before key deletion keeps a way in |
| 3 | MFA on the IAM user, credential report | The admin identity is the same threat model as root |
| 4 | Budget and Cost Anomaly Detection | Cost visibility before you change anything risky |
| 5 | CloudTrail trail and root-login alert | Detection before you make risky changes |
| 6 | Activate IAM billing access | Otherwise its root-only, and you should use root as little as possible |
| 7 | Identity Center, then stop using root | Never in the other order |
| 8 | GitHub OIDC, secret scanning, gitleaks | Removes the last static key |
| 9 | Protect the Terraform state bucket and CDK bootstrap | Before scanning the IaC that writes to them |
| 10 | Confirm S3 defaults, CloudTrail validation and lifecycle, domain transfer lock | Independent, cheap, no dependencies |
| 11 | Disable unused opt-in regions | Shrinks what the region-deny policy has to cover |
| 12 | Quota checks, IMDSv2, EBS encryption, default-VPC deletion, Access Analyzer | Independent |
| 13 | DNSSEC | Quite optional, but it was mentioned, so |
| 14 | Budget action, narrow deny, manual approval first | After you have a working break-glass path |
| 15 | GuardDuty trial, decide at day 30 | Trial clock runs per region |
| 17 | IaC scanning, User Notifications, DNS backup, cost allocation tags | Independent |
What the whole thing costs#
| Items | Cost |
|---|---|
| Everything in posts one and two, plus quotas, region controls, regional defaults, Access Analyzer, IaC scanning, tags, notifications, DNS backup | $0 |
| Budget and budget action | $0, within the free budget-day allowances |
| CloudTrail trail | $0 in events, cents in S3 storage |
| DNSSEC KMS key and signing | Roughly $1 |
| GuardDuty after the trial | $1 to $5, optional |
| AWS Config | $0 deferred, $1 to $5 if enabled and scoped |
| Steady state without GuardDuty | Roughly $1 to $2 per month |
One hour in the first post, an afternoon across the rest, and roughly the price of a coffee per year to run. The most expensive line item in the whole program is the security key you buy once.
That completes the program for an account this size (e.g. individual, small team). One more post covers why finishing it does not mean you now know what AWS security looks like at an enterprise, and which parts of it actually survive when things start to scale.
Caveats#
Pricing and free-tier figures here are, hopefully, current as of 2026, but AWS changes both frequently. Verify on the official pricing pages before relying on exact numbers (sometime pricing pages lie too
And none of this is a compliance framework. It is a proportionate baseline for one developer with a small account. Test and adjust the whole thing when the workload stops being small.
Originally published at https://iuriio.com/blog/posts/2026/08/aws-hardening-long-tail